If you’re searching for what is a digital media renderer, you’re probably trying to understand how “after” photos, virtual staging, and photoreal listing visuals get created.
In real estate, rendering isn’t just about pretty pictures—it’s about helping buyers visualize potential while keeping the imagery consistent with the home’s true layout and features.
Below is a plain-English definition, what a renderer actually does, and when to choose rendering vs. 3D vs. traditional photo editing for property marketing.
Definition: digital media renderer (plain-English)
A digital media renderer is a tool (or process) that turns digital inputs—like photos, 3D models, design elements, and textures—into a finished visual output such as a photoreal image, composite, or marketing graphic. In real estate, it’s often used to create believable “after” visuals for renovations, staging, or design concepts while keeping lighting, perspective, and materials consistent.
What a “renderer” is in digital media
In simple terms, what does a renderer do? It “finishes” an image by calculating (or synthesizing) how a scene should look when elements like light, shadows, and surface materials are applied.
That’s the core of digital media renderer meaning:
- It takes inputs (photos, models, textures, instructions)
- It applies visual rules (lighting, perspective, material behavior)
- It outputs a final image (or frames of video) that looks cohesive
Common outputs: still images, photorealistic renders, mockups, and composites
For property visuals, common deliverables include:
- Photoreal still renders (kitchen refresh, bathroom upgrade, new flooring)
- Composites (inserting new finishes into an existing listing photo)
- Mockups (simple, marketing-ready “concept” visuals)
- Before/after pairs for listing pages, brochures, or social posts
What does a digital media renderer do?
A renderer is usually part of a larger visualization workflow. The “render” is the moment you generate the finished output—often after decisions about layout, finishes, and style are already made.
Typical workflow: input assets → scene/composition → lighting/materials → output
A practical workflow for real-estate imagery often looks like this:
- Input assets
- Listing photos, room dimensions, reference styles, or a 3D model
- Scene or composition setup
- Align perspective, define what stays vs. changes (e.g., cabinets stay, counters change)
- Lighting + materials
- Apply believable shadows and reflections; match color temperature to the original photo
- Output + review
- Export final images for MLS, brochures, and social; collect revision notes
Related concept: you can sometimes convert a photo to a 3D render for more control over geometry and camera angles (note: linked resource is in Spanish).
How realism is achieved (high level, non-technical)
Realism typically comes from consistency:
- Perspective match: new elements follow the room’s camera angle and vanishing points
- Lighting match: shadows fall the same direction as existing objects
- Material behavior: gloss, grain, and reflections look right for wood, stone, metal, glass
- Scale + occlusion: objects sit on the floor properly; edges don’t “float”
If any one of these is off, the image reads as “fake” even if it’s high resolution.
Digital media renderer vs. 3D renderer vs. photo editor
People often use these terms interchangeably, but they’re not the same. Here’s a clean comparison you can use when deciding what you actually need.
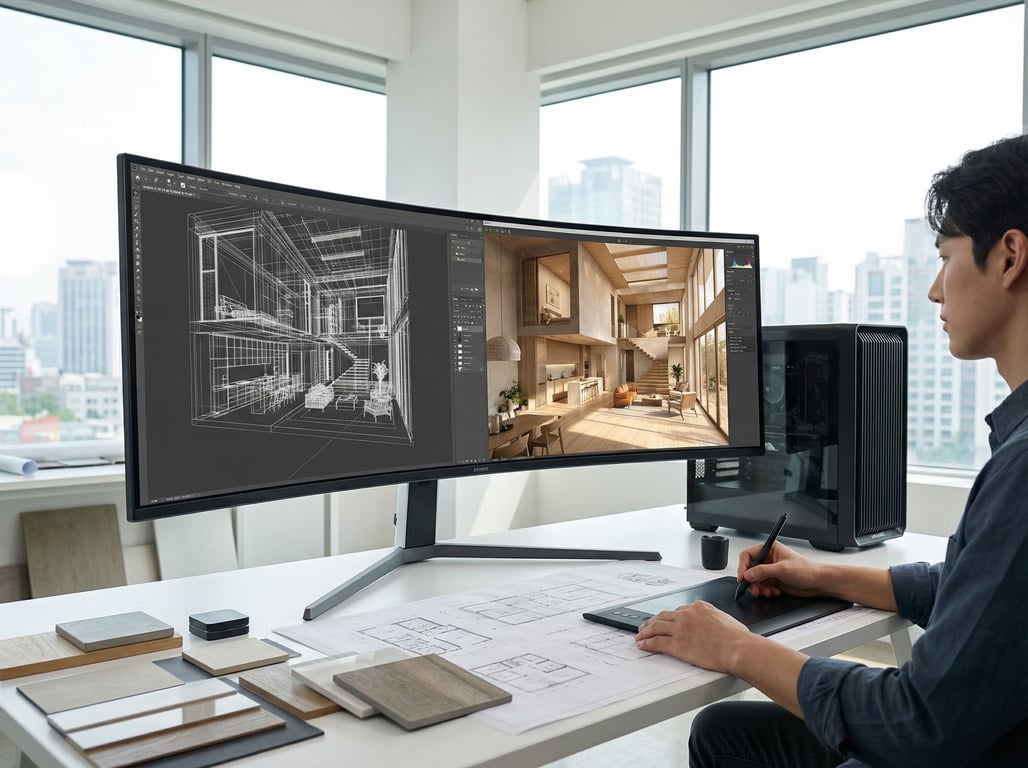
When it’s 3D rendering
It’s 3D rendering when the scene is built in 3D geometry (even if it’s based on a real room). This is ideal when you need:
- A new camera angle that wasn’t photographed
- Major layout changes (moving walls, resizing windows, reconfiguring kitchens)
- High control over lighting and materials across multiple views
For examples of the style range and outcomes, see 3D rendering modern house ideas.
When it’s photo compositing
It’s photo compositing when you start with a real photo and blend in changes (furniture, finishes, decor) while preserving the original perspective. This is often best for:
- Virtual staging (adding furniture to an empty room)
- Surface-level upgrades (paint color, flooring swap, fixture changes)
- Fast “what it could look like” listing visuals
Where AI-assisted rendering/visualization fits
AI-assisted tools can speed up:
- Style exploration (modern vs. farmhouse vs. Scandinavian)
- Material swaps (flooring, countertops, wall colors)
- Clean-up tasks (removing clutter, improving balance)
The tradeoff is predictability: AI can introduce small inaccuracies (extra windows, altered room proportions, inconsistent trim). For real-estate marketing, the best workflows keep tight constraints and review outputs carefully.
Real-estate marketing use cases (high intent)
This is where a digital media renderer matters most: producing visuals that help buyers understand space and potential—without misrepresenting what’s actually there.
Before/after renovation visuals for listings
“After” visuals are common when a home needs updates but you want to show the likely payoff:
- Outdated kitchen → refreshed cabinets + counters + lighting
- Worn flooring → new LVP/hardwood concept
- Dark paint → brighter neutral palette
These work well in:
- Listing presentations
- Seller pitches
- Renovation ROI conversations
Virtual home staging imagery
Virtual staging helps empty rooms feel livable by adding:
- Appropriately scaled furniture layouts
- Rugs, art, lighting, and accessories
- Style matching the target buyer (e.g., urban modern vs. family-friendly)
The key is consistency: staged items should match room lighting and should not block architectural features.
Exterior + yard visualization (light mention, without duplicating existing landscape/backyard topics)
Exterior rendering can support:
- New paint color + trim combinations
- Updated front door/garage door styles
- Minor curb-appeal upgrades (planters, lighting, walkway materials)
For property marketing, keep exterior changes realistic and aligned with what can be executed and permitted.
Renovation concepting for homeowners/contractors
Concept renders are useful before spending money:
- Comparing finish packages (countertops, cabinets, hardware)
- Selecting cohesive materials
- Avoiding costly change orders by aligning expectations early
How to evaluate a renderer for property visuals
If you’re choosing a service or tool for real-estate visuals, focus on outputs and process—not buzzwords.
Realism and consistency
Checklist for believable results:
- Does it match the original photo’s camera height and perspective?
- Are shadows and reflections consistent across edits?
- Do repeated elements (floorboards, tile) avoid obvious repetition?
- Do edges look clean around windows, trim, and railings?
Speed/turnaround and revisions
For listing timelines, ask:
- Typical turnaround per image (e.g., 24–72 hours)
- Number of included revision rounds
- How feedback should be provided (markup, reference links, written notes)
Style control and constraints
A good renderer should handle constraints like:
- “Keep cabinets, only change counters + backsplash.”
- “Do not change window size, ceiling height, or room layout.”
- “Match existing daylight direction.”
You’ll get better results when the workflow supports specific instructions and reference images.
Ethics/disclosure: labeling AI or virtual staging in listings
Many MLSs and brokerages have rules on disclosing virtual staging or altered imagery. A practical approach:
- Label images clearly (e.g., “Virtual staging” or “Rendering”) where required
- Avoid edits that materially misrepresent property features (e.g., adding windows, changing lot lines)
- When in doubt, follow your MLS/broker guidance and local policies
This is general information—not legal advice—and requirements can vary by market.
Key takeaways
- Keep the article anchored in property visuals: listing photos, renovation concept images, virtual staging, and marketing deliverables.
- Avoid creating a “how to use Property Glow” tutorial; keep product mentions optional and minimal, focusing on definitions and decision criteria.
- Use glossary-style formatting for the definition section to compete for featured snippets.
- Include a short compliance note on disclosure and MLS/local rules without making legal claims.
FAQ
What is a digital media renderer in simple terms?
It’s a tool or process that turns inputs (like photos, 3D elements, and materials) into a finished visual—often a realistic image used for marketing or design.
Is a digital media renderer the same as a 3D renderer?
Not always. A 3D renderer specifically outputs images from 3D geometry. “Digital media renderer” is broader and can include photo compositing and other rendering workflows.
Can a renderer create realistic renovation ‘after’ images from photos?
Yes—often via compositing and rendering techniques that keep the original room perspective while swapping finishes like floors, paint, counters, and lighting.
What’s the difference between rendering and photo editing in real estate?
Photo editing typically improves the existing image (color, exposure, cleanup). Rendering creates or inserts new visual elements (staging furniture, new materials, renovation concepts) while maintaining realism.
Do I need to disclose virtual staging or AI-enhanced images in a listing?
Often, yes—rules vary by MLS and brokerage. When required, label altered images (e.g., “Virtual staged” or “Rendering”) and avoid changes that could mislead buyers about permanent features.