If you searched for Canva AI Interior Styler alternatives, the real question is usually not whether Canva can make a room image look stylish. It is whether a Canva-style workflow can produce a room edit that still looks believable enough for a listing, seller presentation, renovation preview, or before-and-after comparison.
In many cases, the answer is still the same in 2026: good for concepting, inconsistent for listing-grade realism.
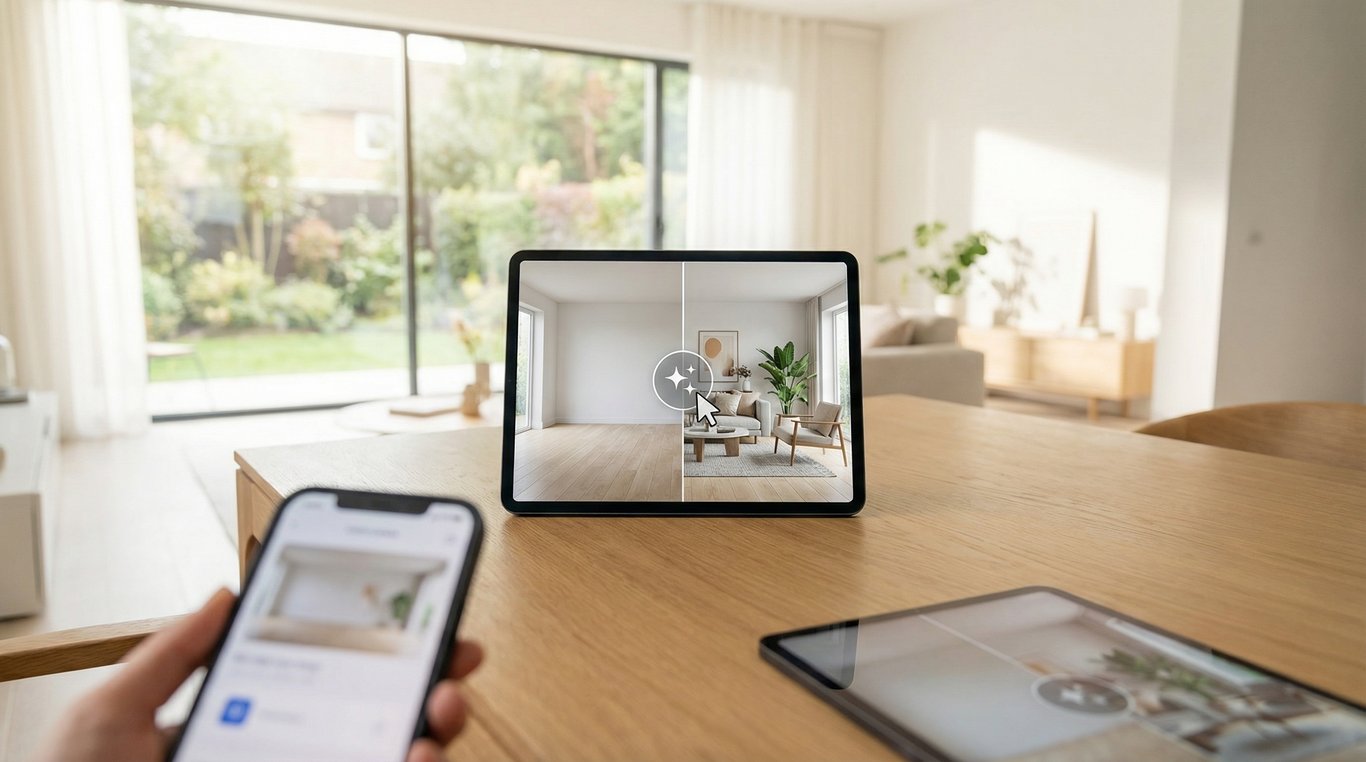
Canva remains excellent for moodboards, social graphics, and quick design exploration. But room-edit workflows for real estate usually need tighter control over walls, windows, perspective, materials, and consistency across multiple photos. That is where people start looking for better alternatives. They want the speed of AI styling without the visual drift that makes an image feel generic, inaccurate, or risky to publish.
Different alternatives solve different jobs. Some are better for virtual staging empty rooms, some are better for renovation-style finish changes, and some are better when you need a layout-accurate 2D or 3D plan rather than a photo edit. The right choice depends less on brand recognition and more on whether you need photorealism, speed, architectural accuracy, or repeatable results across a full property set.
This guide keeps that distinction clear, adds a fresher evaluation framework for 2026 buying decisions, and explains which types of alternatives fit real-estate-style room edits best. It also addresses the search intent behind blog/canva ai interior styler alternatives, which is usually less about finding a random app list and more about choosing a workflow that holds up under real buyer scrutiny.
Quick comparison
| Workflow | Best for | Where it falls short |
|---|---|---|
| Canva-style AI styling | Moodboards, fast social visuals, early concepts | Weak geometry control for listing-grade images |
| Virtual staging app | Empty rooms that need furniture and decor | Less useful for finish changes or remodel concepts |
| Photo-based renovation visualizer | Realistic finish updates from a real photo | Needs better source photos and tighter review |
| 2D/3D room planner | Layout accuracy and reusable models | Slower than photo-based tools for quick marketing visuals |
This guide clarifies what people mean by Canva AI Interior Styler, how AI room styling tools work, and which alternatives tend to produce more realistic before-and-after results.
Quick answer: is Canva AI Interior Styler good for real-estate-style before-and-after visuals?
Usually, it is better for concept direction than for photorealistic property marketing images.
If you need MLS-ready “after” shots, seller-facing renovation previews, or ad creative that still matches the real room, prioritize specialized renovation visualization or virtual staging tools that preserve the room structure more reliably.
The biggest shift over the past year is not that general-purpose AI tools suddenly became perfect. It is that buyer expectations rose. Consumers now recognize AI-generated interiors faster than they did even a year ago. Over-smoothed surfaces, warped trim, floating decor, or impossible windows get noticed quickly. That makes realism, restraint, and disclosure more important than novelty.
What it is best for
Canva-style workflows still make sense when the image is serving a communication role more than a documentary one. They are effective for fast idea generation across styles like modern, coastal, traditional, or Scandinavian, and they make it easy to turn one styled room into a social post, seller deck, flyer, or branded presentation. For agents and marketers, that combination of image generation plus layout is still genuinely useful.
If the final deliverable is a polished marketing graphic rather than a strict architectural representation, Canva can remain part of the workflow. That is why many teams do not fully replace it. They simply stop asking it to do the final realism-heavy job.
Where it falls short for listing-quality realism
Listing-quality visuals usually demand stable geometry with straight walls and unchanged openings, consistent windows, doors, trim, and built-ins, realistic shadows and light direction, believable material rendering for wood, stone, tile, and fabric, and consistency across multiple rooms in the same property.
Many Canva-like AI styling flows still drift on these points, especially when you need the same camera angle preserved across several edits. A result may look attractive at thumbnail size and still fail when a seller zooms in on the window casing or when a buyer compares the edited kitchen to the actual showing photos.
What people mean by “Canva AI Interior Styler”
People rarely mean a single official feature with that exact name. More often, they are describing a Canva-adjacent workflow: upload a room photo, use AI to generate variants or transformations, then place the results into a polished marketing layout.
For the canonical explainer of the feature people are usually referencing, see Canva AI Interior Styler.
Which Canva features users usually mean
Depending on what is available in their account and region, users may be referring to AI image generation from prompts, background or object editing, magic-style transforms and variants, or layout tools that package room visuals into presentations or listing collateral.
These are strong creative tools, but they are not always optimized for architectural fidelity. That is the gap most alternatives are trying to fill.
The two jobs people mix together
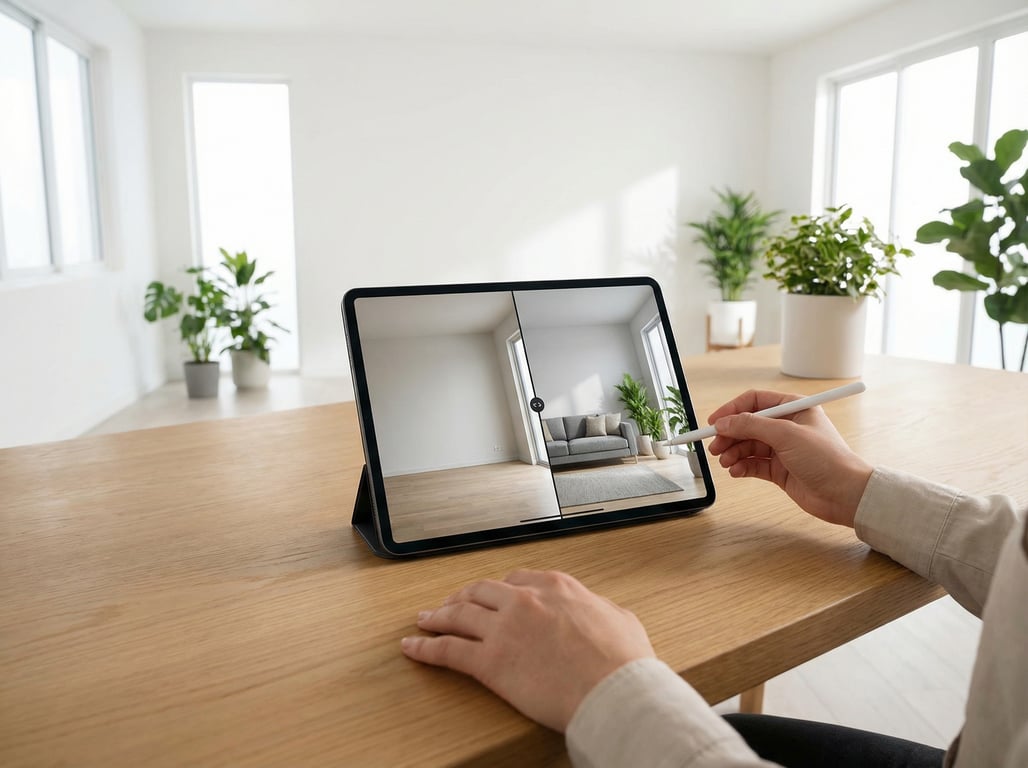
Two different tasks often get lumped into one search. The first is staging inspiration: show me how this empty room could look furnished. The second is renovation visualization: keep the room the same, but change floors, cabinets, paint, tile, or lighting fixtures.
That distinction matters. Staging can tolerate a little more creative interpretation because the goal is often emotional marketing. Renovation visualization demands tighter adherence to the actual room because people are judging specific surfaces and finishes. If your goal is closer to renovation visualization, you will usually want a more specialized tool, especially when buyer expectations or seller trust are involved.
How AI interior styling tools typically work
Most tools fall into two technical buckets: they either transform your photo into another photo-like result, or they generate a fresh image from scratch using your prompt.
Photo-to-photo vs prompt-only generation
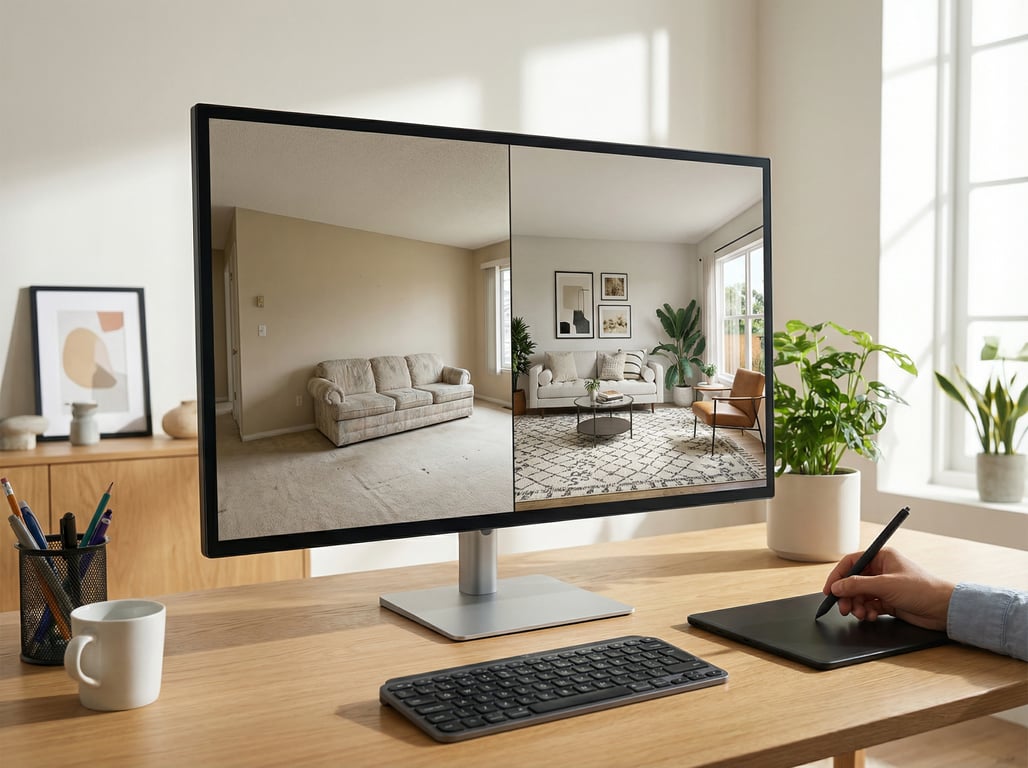
Photo-to-photo workflows start with the real room image and attempt to keep the structure while changing style, furniture, or finishes. This is usually the better option for before-and-after sets because the model has actual geometry to anchor to.
Prompt-only generation creates a new room based on your text. That can be useful for inspiration, moodboarding, or design exploration, but it is weaker for matching a real property. For commercial real estate use, photo-to-photo tools are usually the safer starting point.
Why realism still breaks
AI has improved fast, but room edits still fail in predictable places. Wall lines bend. Window sizes change between versions. Ceiling edges soften. Cabinet faces lose alignment. Flooring patterns scale unrealistically. Mirrors stop reflecting the room correctly. Natural light direction conflicts with shadow placement.
These issues matter because buyers and sellers do not inspect room images like abstract art. They compare them to the real space. A slightly wrong sofa is forgivable. A window that moved six inches is not.
What improved in the past year
Compared with earlier AI room styling tools, newer alternatives are generally better at preserving major room geometry, following reference styles more consistently, generating higher-resolution outputs, keeping furniture scale more believable, and supporting selective edits through masking or protected areas.
The biggest practical improvement is selective control. More tools now let you protect architectural elements or isolate the exact surfaces you want changed. That is especially helpful for kitchen and bath previews, where you may want to replace cabinet color and counters without allowing the AI to reinvent the room.
Still, better does not mean foolproof. Human review remains necessary before using images in a listing, brochure, or paid campaign.
Evaluation checklist: how to choose a Canva AI Interior Styler alternative
If you are comparing tools in this category, evaluate them against the actual job rather than against the prettiest demo image. A beautiful sample room on a homepage tells you almost nothing about how a tool will handle your low-light living room with mixed color temperatures and a reflective stone floor.
1. Realism
Look closely at perspective and straight lines, baseboards and crown lines, shadow direction, mirror and glass behavior, tile size, plank width, and fabric texture. A practical test is to zoom in around windows, recessed lights, countertop edges, and trim junctions. That is where artifacts usually show first.
Good realism is not just about sharpness. It is about whether the image still feels like a plausible photograph of the original room.
2. Geometry preservation
For real estate, this is often the deciding factor. Does the tool keep the same window placement? Does it preserve ceiling height and room proportions? Can it protect fireplaces, built-ins, vanities, or islands? Does it keep the same camera angle without inventing a new room?
If the answer is inconsistent, it may still be useful for concepting but not for listing-grade work. This is the point where many people looking for blog/canva ai interior styler alternatives realize they do not actually need “more styles.” They need stronger structural discipline.
3. Control over edits
Strong tools let you control more than style labels. Look for the ability to choose room type, specify staged versus renovated output, keep layout unchanged, mask areas that should not change, apply style presets consistently, and rerun variations from the same source image.
If you are comparing broader categories first, an AI decorating app overview can help narrow the field.
4. Consistency across a full listing
A real property marketing package rarely needs one perfect hero image. It needs 6 to 25 images that feel like the same home. Evaluate whether the tool can reuse style settings across rooms, maintain similar palettes and finishes, avoid changing architectural details from image to image, and support batch or project-based workflows.
This is one of the most overlooked reasons teams move beyond Canva-style room edits. Consistency is where a lot of general-purpose tools start to feel improvised.
5. Commercial rights and disclosure
Before publishing, confirm commercial usage rights, whether attribution is required, whether edited outputs can be used in MLS, portals, brochures, and ads, and whether your market expects disclosure for virtually staged or AI-enhanced imagery.
Rules vary by market, brokerage, and portal. In practice, the safest approach is to keep records of the original photo, prompt or settings, and final edit decisions. That habit helps with quality control and protects you if a seller or compliance team later asks how an image was produced.
6. Speed and cost per usable image
Do not just compare subscription prices. Compare cost per approved output. How many rerolls are usually needed? How long does a clean room take from upload to final export? Can team members collaborate? Is the export resolution good enough for listing portals and print? Does the tool save time once you have multiple rooms?
A cheaper tool that needs six retries per room often costs more in labor than a pricier, more controllable workflow.
Canva AI Interior Styler vs virtual staging tools
Searchers often use these terms interchangeably, but they solve different problems.
When Canva is enough
Canva-style workflows are usually enough when you need a quick concept for a seller presentation, a social graphic built around one room, a flyer or brochure layout with a styled hero image, or internal design exploration before choosing a final direction.
That is why many teams keep Canva in the process even when it is not the final image generator. It is often the packaging layer, not the reality layer.
When you need geometry preservation
If the goal is a believable before-and-after tied to a real room, geometry matters more than convenience. Walls, windows, ceiling lines, built-ins, and cabinetry need to stay stable or the result stops feeling trustworthy. Specialized virtual staging and renovation tools tend to perform better here because their workflows are built around room preservation, not generic visual creativity.
When commercial listing use matters
Listing images need more than style. They need reliable room matching, clear commercial usage terms, enough resolution for portals and print, and consistent quality across several rooms. That usually pushes you toward more specialized virtual staging or renovation-visualization workflows.
When multi-room consistency matters
One attractive room image is easy. A whole property set with a coherent style is harder. If you need six to twelve images that feel like one home, saveable presets, project controls, and repeatable material choices matter more than novelty. This is where serious alternatives distinguish themselves from casual styling tools.
Best alternatives to Canva for interior styling
The most useful way to think about alternatives is by workflow category, not by hype.
Photo-realistic renovation and virtual staging generators
Choose these when you need believable before-and-after visuals that still match the original photo. Their typical strengths are better geometry retention, more realistic shadows and materials, stronger results for listing photos, and more credible renovation previews.
They work best for listing-ready after images, empty-room staging, finish-change visualization, and seller presentations that need realism. Their main limitation is that they are usually less convenient than Canva for broader graphic design, text layout, and branded collateral.
If the job is primarily furnishing an empty space rather than changing finishes, virtual home staging with AI is often the more precise category.
2D and 3D planners for layout accuracy
When exact dimensions, fit, or spatial planning matter, 3D planners beat AI photo transforms. They are better for layout validation, furniture fit checks, and remodel planning, especially when walls or openings may change.
Their limitation is speed. If you only need a fast visual concept for marketing, 3D can feel heavy. But if the project affects structure, layout, or cabinet runs, the extra setup is usually justified.
A good rule is simple: if you are changing architecture, use 3D; if you are changing appearance, use photo-based visualization.
Hybrid workflow: AI first pass plus manual polish
For many real estate teams, the fastest path to quality is hybrid. Generate several AI variations per room, choose the version with the strongest structural accuracy, retouch small artifacts and correct verticals, standardize exposure and color temperature across rooms, and then export the final visuals into your brochure or listing presentation.
This approach works well for teams that need speed first and polish second, especially in higher-volume marketing environments. The tradeoff is more process overhead, but the quality jump is often worth it.
A practical workflow for agents, marketers, and homeowners
A repeatable workflow usually matters more than the perfect tool.
Step 1: start with better source photos
Use this capture checklist: shoot at chest height, keep the camera level, avoid extreme wide-angle distortion, use bright natural light where possible, reduce mixed lighting temperatures, declutter counters and personal items, and take two or three angles per room.
Good inputs reduce AI errors more than most people expect. Many “bad AI” results are actually bad source-photo problems.
Step 2: decide whether you are staging or renovating
Before you generate anything, define the objective. Are you adding furniture and decor, changing finishes and fixtures, or simply producing inspiration rather than a room-accurate final image? This one decision filters out many bad-fit tools and shortens revision time.
Step 3: create three directions, not twenty random ones
A simple and efficient workflow is to generate three distinct styles, evaluate each for realism and geometry preservation, choose one direction, and iterate only within that direction. This saves time and helps keep the property visually consistent.
Step 4: lock a style language across the whole property
To keep a listing cohesive, reuse the same prompt structure or preset, define a fixed palette, keep flooring consistent between adjacent rooms, maintain similar metal finishes and wood tones, and standardize white balance and vertical correction before export.
This matters because buyers interpret inconsistency as uncertainty. A home that looks coastal in one room and urban-industrial in the next does not feel intentionally marketed.
Step 5: review like a buyer would
Before publishing, ask whether windows and doors still match reality, whether the AI changed room proportions, whether surfaces look believable close up, whether the result is aspirational without being misleading, and whether a buyer would feel surprised when visiting the property.
That last question is the most important one in the entire workflow.
Best Canva alternative by goal
Best for quick concept mockups
Use a lightweight photo-styling workflow when speed matters more than precision and the image is mainly for discussion, presentations, or internal review. This is where Canva-like tools still perform well.
Best for real-estate listing visuals
Use a tool that preserves architecture, supports multiple rooms, and clearly allows commercial marketing use. If the image must survive close inspection, this category usually wins.
Best for renovation-style before-and-afters
Use a renovation visualizer when the main question is about finishes, cabinetry, paint, flooring, or tile rather than furniture staging alone. The more specific the finish decision, the more specialized your tool should be.
Best when you want the easiest workflow
Use the tool with the fewest setup steps if time is the bottleneck. For many teams, that means Canva for concept direction and a more specialized tool for the final room visuals. In practice, the best alternative is often not a total replacement but a better division of labor.
FAQ
What are the best Canva AI Interior Styler alternatives?
The best alternative depends on the job. Virtual staging tools are usually better for empty rooms, photo-based renovation visualizers are better for realistic finish changes, and 2D or 3D planners are better when layout accuracy matters most.
Can Canva create realistic before-and-after renovation photos?
It can create strong concept images, but for listing-grade realism with stable geometry, consistent windows, and believable lighting, specialized renovation visualization tools usually perform better.
What is the difference between virtual staging and renovation visualization?
Virtual staging adds or changes furniture and decor while generally keeping finishes intact. Renovation visualization changes finishes and fixtures such as floors, cabinets, paint, counters, or tile while trying to preserve the room structure.
How do I keep the same layout and windows in AI redesigns?
Use photo-to-photo tools, start with clean and level source photos, add constraints like “keep layout, windows, and doors unchanged,” and choose tools that support masking or protected regions.
What is the best AI tool for listing photos?
The best option is usually the one that preserves geometry, works consistently across multiple rooms, supports commercial usage, and produces exports large enough for listing portals and print marketing.
Are AI room edits safe to use in real estate marketing?
They can be, but only with review. The image should remain truthful to the property, and you should confirm local rules, MLS guidance, brokerage policy, and any disclosure expectations around virtually staged or AI-enhanced imagery.
Should I use AI or 3D for a remodel preview?
Use AI when you want a fast photo-based preview of finish changes. Use 3D when dimensions, wall changes, cabinet layouts, or exact fit matter. If the project affects structure, 3D is usually the safer choice.
Why are some AI room edits impressive in one image but unreliable across a full property?
Because generating one attractive image is much easier than maintaining architectural consistency, finish continuity, and lighting logic across multiple rooms. Real estate marketing exposes that weakness quickly, which is why project-level control matters so much.
Final takeaway
The strongest Canva AI Interior Styler alternatives are not necessarily the flashiest tools. They are the ones that match the job.
If you need quick ideas, Canva-style workflows are still useful. If you need believable room edits for real estate, seller presentations, or renovation previews, look for alternatives built around photo-to-photo realism, geometry preservation, selective editing, and multi-room consistency.
In most real estate workflows, the winning setup is not Canva alone. It is Canva for packaging and a more specialized visualization tool for the room edits themselves. That is the clearest answer for anyone researching blog/canva ai interior styler alternatives today: do not judge alternatives by how artistic they look in a demo, judge them by how faithfully they keep the room you actually need to market.