If you want to stage your house to sell, think like a buyer scrolling listings at speed: they’re looking for light, space, and a layout that “makes sense” in photos.
Good home staging isn’t about perfection or expensive furniture. It’s about removing visual friction, improving flow, and helping a buyer imagine their life there—both online and during showings.
Below you’ll find a fast pre-photo reset, a home staging checklist (room-by-room), common mistakes, typical cost ranges, and a simple decision framework for virtual home staging vs staging your house in person.
What does “stage your house” mean in real estate?
To stage a house means preparing it to photograph and show at its best by optimizing layout, lighting, cleanliness, and neutral appeal—so it feels larger, brighter, and easier to imagine living in.
Staging vs decorating vs renovating (quick definitions)
- Staging: Short-term presentation for selling. Focus: perception, flow, and photos.
- Decorating: Long-term personalization. Focus: your taste and daily living.
- Renovating: Permanent improvements. Focus: condition, function, and value-add (often time/cost heavy).
When you’re trying to stage your house to sell fast, prioritize changes that show immediately in photos: clear surfaces, consistent light, and furniture that fits the room scale.
What staging changes in listing photos and showings
Staging improves:
- Perceived square footage (clear walk paths, fewer visual “stops”)
- Brightness (balanced bulbs, open treatments, fewer dark corners)
- Layout clarity (buyers understand how to use the room)
- Emotional pull (warm, neutral, “move-in ready” cues)
Stage your house in 60 minutes: the fast pre-photo checklist
Use this when photos are scheduled soon, or before an unexpected showing.
60-minute checklist (printable-style):
- Toss/stack into a “hide bin”: mail, remotes, chargers, kids’ items
- Clear all counters except 1–3 intentional items
- Remove personal photos, name signs, and highly specific collections
- Make beds tight; smooth duvet; align pillows
- Swap to one neutral hand towel per bath; close toilet lids
- Turn on every light; replace any dead bulbs
- Open blinds/curtains evenly (match left/right)
- Wipe mirror smudges and stainless fingerprints
- Vacuum visible lines and edge-baseboards in photos
- Put pet bowls, crates, and litter out of sight
- Park cars off the driveway if possible; roll bins away
Declutter + depersonalize (what to remove first)
Remove items that read as “someone else’s life” or create visual noise:
- Countertop appliances (leave at most one, like a coffee maker)
- Bathroom products (toothbrushes, bottles, razors)
- Fridge clutter (magnets, photos, calendars)
- Extra furniture that pinches walk paths
- Bold/seasonal decor (holiday, neon, heavy themes)
A quick rule: if it’s small, reflective, or colorful, it shows up louder in photos than in real life.
Lighting + bulbs + window treatments
Lighting is one of the highest-ROI staging moves.
- Use one color temperature throughout main areas (e.g., soft white or bright white), so rooms don’t look patchy.
- Match bulb brightness by room function (brighter in kitchen, moderate in bedrooms).
- Open treatments to maximize daylight, but avoid harsh glare by angling blinds consistently.
Camera-friendly cleaning priorities (what photos reveal)
Photos exaggerate:
- Streaks on mirrors, glass, and stainless steel
- Dust on dark surfaces and ceiling fans
- Floor crumbs, hair, and rug edges
- Soap scum and dull fixtures
Prioritize: mirrors → kitchen surfaces → floors → bathrooms → entry glass/door.
Room-by-room staging checklist
This is the staging your house playbook focused on buyer flow and listing photos.
Entryway: first impression + sightlines
Goal: make the home feel open the moment the door swings.
- Clear the floor (no shoes pile, no crowded racks)
- Add one simple landing spot (tray or small bowl for keys)
- Use a slim runner to lead the eye inward (avoid busy patterns)
- Ensure the first view is clean: straighten artwork, remove clutter from adjacent surfaces
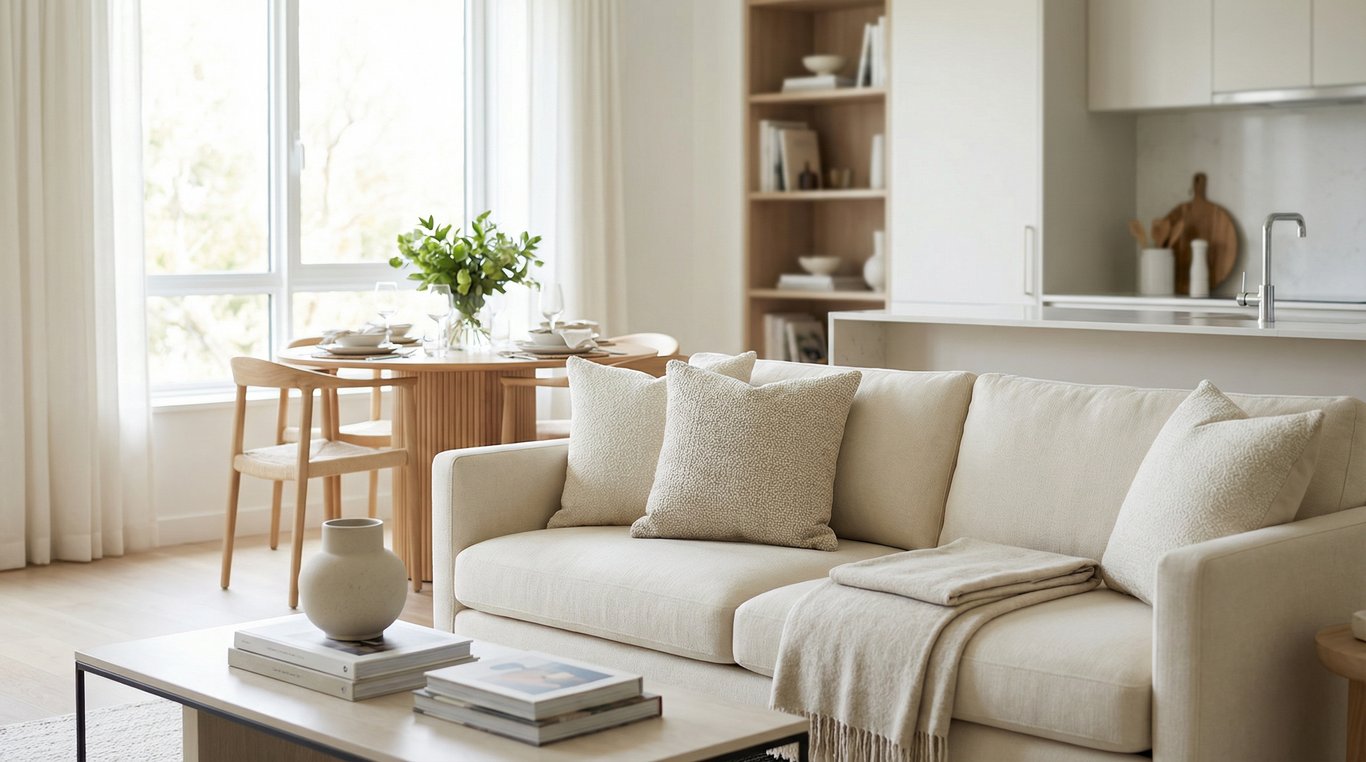
Living room: furniture placement for perceived space
- Float furniture to create walk paths (don’t block natural routes)
- Keep the largest piece (sofa) squared to a focal point (fireplace, window, TV wall)
- Use a properly sized rug: front legs of main seating should sit on it
- Limit tabletop decor to 1–2 items; hide cords
- Add one plant or textured throw for warmth—then stop
If you want a current look without overdoing it, borrow cues from these organic modern living room staging ideas.
Kitchen: counters, hardware, and ‘show-home’ cues
- Clear counters to 70–90% empty (leave 1–3 “signals”: cutting board, bowl of lemons)
- Remove dish racks, sponges, soaps (use an under-sink caddy temporarily)
- Add fresh hand towel (neutral) and a clean sink drain
- Align bar stools; set 2 simple place settings if the kitchen has an island
- Replace mismatched bulbs; turn on under-cabinet lighting if available
Primary bedroom: bedding, symmetry, and scale
- Use crisp, neutral bedding (white, beige, light gray)
- Add symmetry: matching lamps or balanced nightstands
- Reduce furniture count (one chair max; remove extra dressers if tight)
- Closet preview: leave breathing room (buyers notice stuffed closets)
Bathrooms: towels, mirrors, and ‘hotel’ cues
- One fresh hand towel per sink; one neatly folded bath towel visible
- Hide all toiletries (including shower bottles if possible)
- Close lids; align mats; empty trash
- Clean mirrors and polish chrome (photos punish water spots)
- Add a small plant or simple soap dispenser as the only accent
Outdoor/backyard: curb appeal and lifestyle scenes
- Mow/edge; sweep entry; clean cobwebs near the door
- Add a simple “lifestyle vignette”: two chairs + small table, or a clean dining set
- Remove hoses, tools, kid clutter; hide bins
- Replace burned-out exterior bulbs (night shots matter)
If you’re struggling to visualize improvements quickly, explore backyard listing visuals to mock up simple outdoor scenes before you spend money.
Common staging mistakes that hurt offers
Too much furniture / blocked walk paths
If buyers have to turn sideways, the room feels smaller.
- Remove the extra chair, second side table, or oversized ottoman first
- Keep a clear, natural path from entry → living → kitchen → primary suite
Mixed color temperatures in photos
One warm lamp + one cool overhead light makes rooms look inconsistent and “off.”
- Standardize bulb temperature in the main living areas
- Turn on the same types of lights room-to-room during photos
Over-personalized themes and bold paint
Themes can distract from features and narrow buyer appeal.
- Replace loud art with simple, neutral pieces
- If repainting is realistic, stick to modern neutrals (avoid extreme undertones)
- Let the home’s architecture be the “theme”
How much does staging a house cost? (typical ranges + what drives price)
Costs vary by market, size, and whether the home is occupied or vacant—but you can plan using buckets.
DIY staging cost buckets
- $0–$150: bulbs, microfiber cloths, storage bins, fresh towels
- $150–$500: neutral bedding, pillows, simple decor swaps, minor hardware refresh
- $500–$1,500: paint for key rooms, landscaping cleanup, rental décor pieces
DIY works best when the home is already in solid condition and you mainly need editing + photo prep.
Professional stager pricing factors (home size, occupied vs vacant, duration)
Professional staging typically depends on:
- Square footage and number of rooms staged
- Occupied vs vacant (vacant often requires more rented inventory)
- Project length (30/60/90-day rental terms)
- Delivery, installation, and pickup logistics
If you’re debating whether to hire help or handle it yourself, this breakdown of interior decorator vs. DIY for a listing can clarify what you’re actually paying for (design plan vs. labor vs. inventory).
Virtual staging vs physical staging: which should you choose?
Use this section to decide between virtual home staging vs staging your house physically—especially if timeline or budget is tight.
Best cases for virtual staging (vacant rooms, style mismatches, speed)
Virtual staging is strongest when:
- Rooms are vacant and hard to read in photos
- Existing furniture is dated, mismatched, or the wrong scale
- You need fast listing photos (or can’t access the property easily)
- You want to test styles (modern, transitional, organic modern) before committing
Next step: compare tools and workflows in AI virtual staging apps for real estate agents.
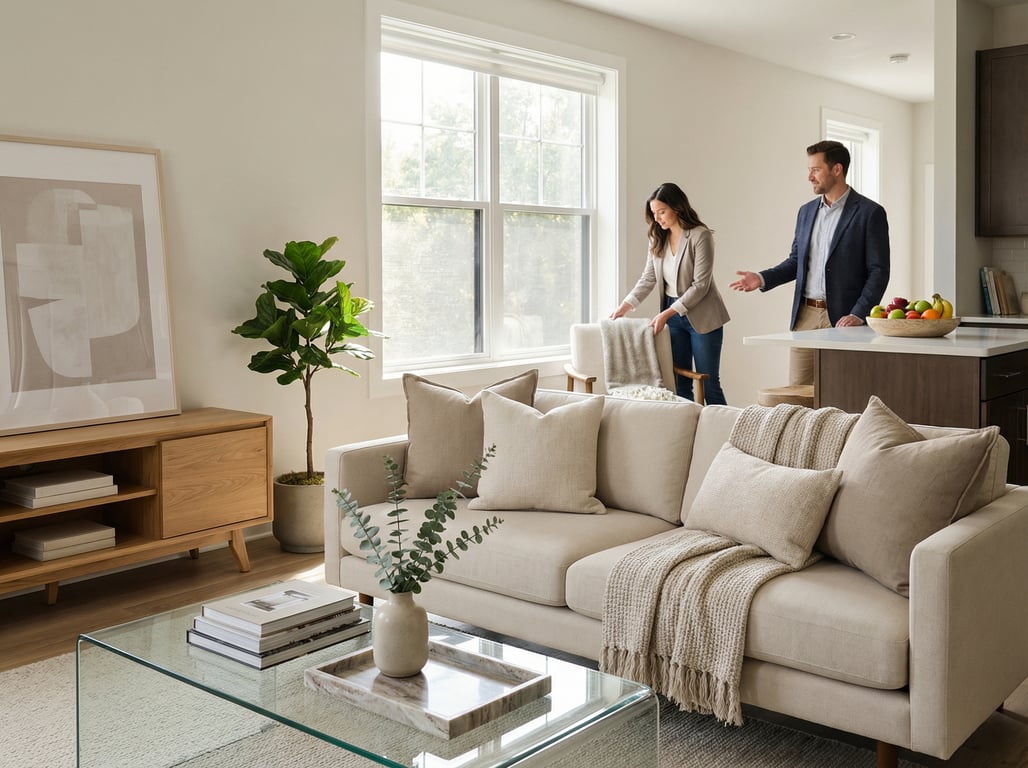
Best cases for physical staging (high-traffic showings, luxury tactile feel)
Physical staging wins when:
- The home will have many in-person showings/open houses
- You’re selling luxury where texture, scale, and material quality matter
- You need to improve how the home feels (not just how it photographs)
- You want to reduce echo/emptiness in a vacant property for walkthroughs
Disclosure/ethics notes for virtually staged photos
- Avoid virtually adding features that don’t exist (e.g., changing window size, removing damage, adding a fireplace).
- Keep edits to furniture/decor, and match the true room dimensions.
- Follow MLS and local rules—many require a “virtually staged” label.
Comparison snippet: Virtual staging vs physical staging
| Criteria | Virtual staging | Physical staging |
|---|---|---|
| Best for | Vacant rooms, fast launch, style reset | Showings, luxury feel, real-world scale |
| Time | Hours to days | Days to weeks (scheduling + install) |
| Upfront cost | Usually lower | Usually higher |
| Photos | Strong impact | Strong impact |
| In-person impact | None | High |
Staging for listing photos: a simple photo plan
Staging should be guided by the shots you need. Plan the photos first, then stage to those angles.
Shot list by room
Aim for clarity, not quantity.
- Exterior: straight-on front, 45° angle, backyard/patio
- Entry: looking into main living area
- Living room: 2 angles (one wide, one toward focal point)
- Kitchen: wide + sink/cooktop angle + island (if present)
- Dining: wide to show relation to kitchen/living
- Primary bedroom: from doorway corner + toward windows
- Primary bath: wide + vanity close-up (if finishes are a selling point)
- Secondary rooms: only if they add value (office, guest room, finished basement)
Angles that make rooms feel larger
- Shoot from corners to show depth (without extreme distortion)
- Keep vertical lines straight (avoid heavy tilt)
- Show connection between spaces (open doorways, sightlines)
- Hide laundry baskets, trash cans, and pet items from the frame
If you need quick concept options before you move furniture, consider AI room design tools (free) for listing visuals to test layouts and styles.
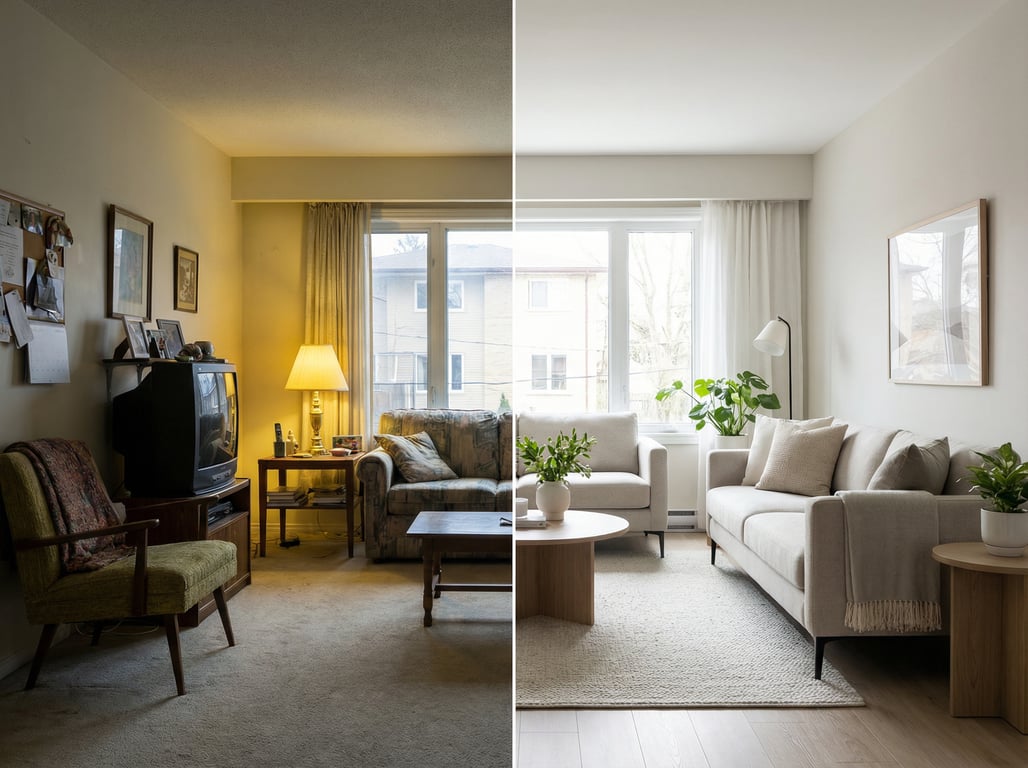
Before/after expectations (what changes are realistic)
Realistic outcomes when you stage your house well:
- Rooms look brighter and more open
- Layout reads faster online (less confusion = more clicks)
- Photos feel consistent from room to room
- Showings flow better (buyers linger instead of navigating around clutter)
Unrealistic expectations:
- Staging won’t fix major condition issues (worn flooring, failing roof)
- It won’t change true square footage—only perceived space
Key takeaways
- Keep the article focused on selling/listing outcomes (buyer perception, photos, walkthrough flow).
- Include a printable-style checklist section (bullets) to match high-intent ‘how to’ behavior.
- Add a clear decision matrix (virtual vs physical staging) to capture related intent without targeting separate head terms.
- Avoid brand-led sections; mention AI visualization only as one option in the decision framework.
FAQ
How do I stage my house to sell quickly?
Start with a 60-minute reset: clear counters, remove personal items, standardize lighting, clean reflective surfaces, and create clear walk paths. Then stage the living room, kitchen, and primary suite first—those drive most buyer decisions.
What rooms matter most when staging a house?
Prioritize the first impression sequence: exterior/entry, living room, kitchen, primary bedroom, and primary bathroom. These areas dominate listing photos and shape the “overall condition” buyers remember.
Is it worth paying for home staging?
Often, yes—when your listing competes with updated homes, your rooms feel small in photos, or you expect heavy showing traffic. If your home already photographs well, DIY staging plus a strong photo plan may be enough.
How much does home staging cost for an occupied house?
Occupied staging commonly costs less than vacant staging because you’re using existing furniture. Price depends on how many rooms are staged, how much editing/rearranging is needed, and whether you’re renting supplemental pieces.
When is virtual staging a better option than physical staging?
Virtual staging is better when rooms are vacant, furniture is mismatched, or you need speed for listing photos. It’s especially useful to help buyers understand layout without paying for delivered inventory.
Do you have to disclose virtual staging in listing photos?
Many MLS systems and local rules require disclosure (for example, labeling images as “virtually staged”). Even when not required, it’s best practice to disclose to avoid misleading buyers about what’s physically included.